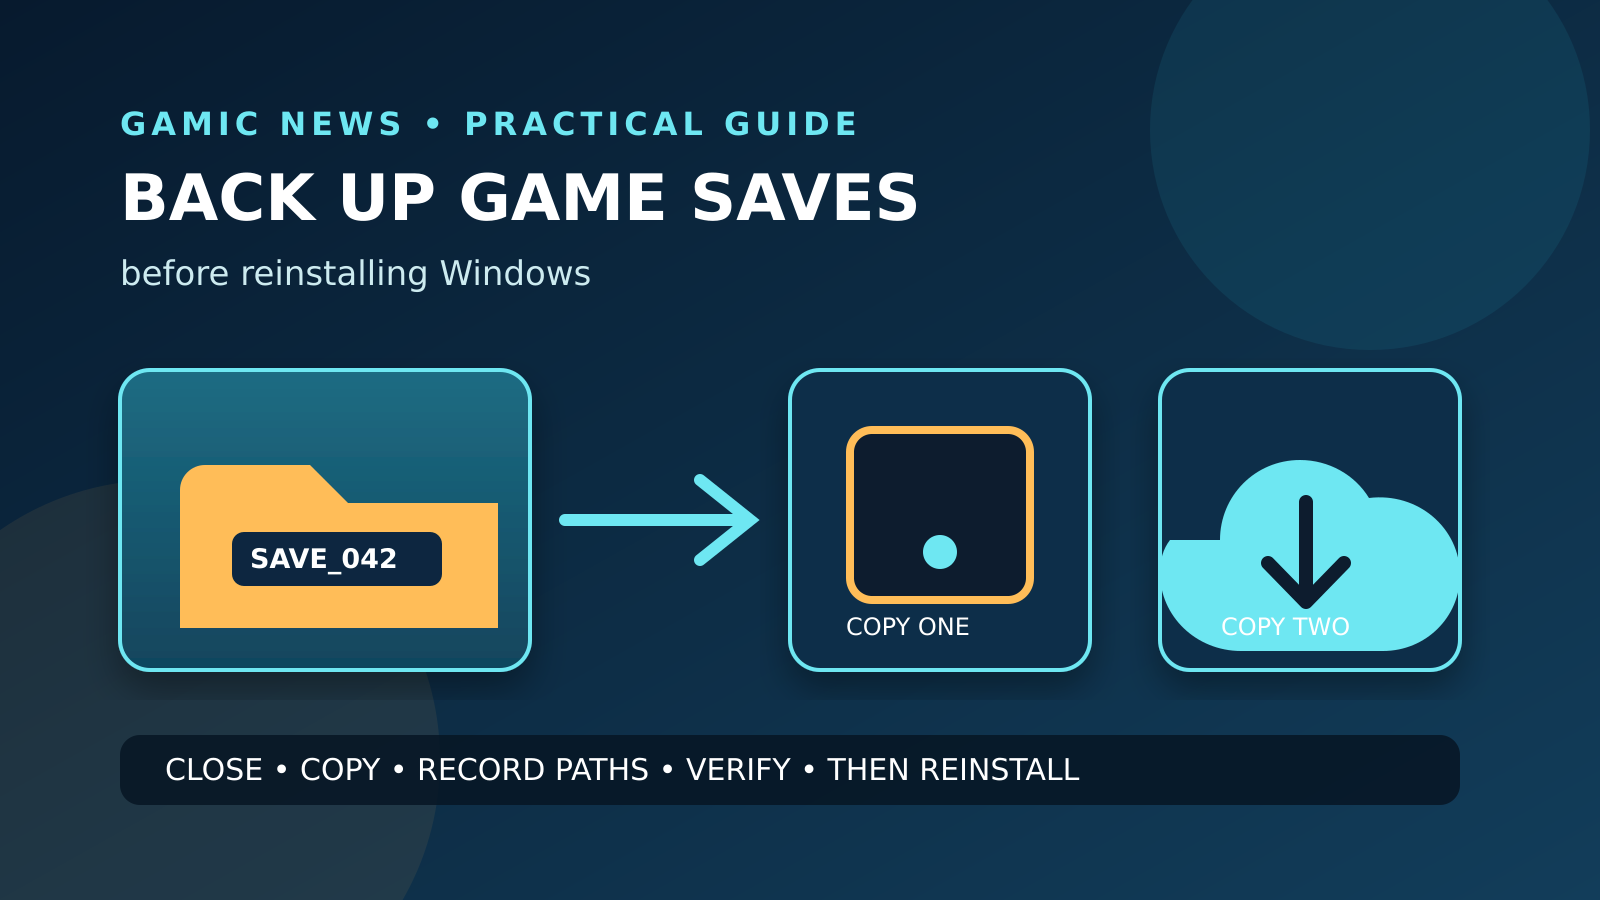
Before reinstalling Windows, make two independent copies of every save you care about: one copy of the game's actual local save folder and one tested backup on a separate device or trusted storage service. Confirm cloud-sync status, close the game and launcher, copy the files, record their original paths, and open at least one copied folder. Cloud saves are useful, but they are not proof that every title, profile, screenshot, mod or configuration file is protected.
A clean Windows installation can solve deep system problems, but it also removes local data that launchers do not manage. Some games synchronize saves; others synchronize only selected files, and older or standalone titles may keep everything locally. A cloud icon can also represent an old revision, a conflict or a sync that never finished. The safe approach is therefore to identify each game's storage method, preserve the local files, verify the copies and only then erase or format anything.
This guide covers ordinary PC game saves and settings. It does not recommend bypassing encryption, DRM or account security, and it cannot recover data that has already been securely erased. File paths and launcher behavior change, so use each publisher's current documentation for the final decision. If a drive is failing, clicking or disappearing, minimize writes and seek professional recovery advice instead of repeatedly scanning or reinstalling it.
Start with an inventory, not a blind folder copy
List the games with progress that would be painful to lose. Include more than the titles installed today: early-access games, emulators, standalone downloads and games you removed but may have left saves behind. For each entry, record the launcher or store, the Windows user account that played it, whether the game advertises cloud synchronization, and the last time the save was opened. This inventory prevents the common mistake of backing up only the biggest installation folders while missing the small save folders that actually matter. For more gaming coverage, read Gaming news and guides.
Separate replaceable program data from personal state. Game executables and downloaded assets can usually be reinstalled; saves, custom maps, replays, screenshots, controller profiles and locally stored mods may not be replaceable. Do not assume the save lives beside the executable. Modern games commonly use Documents, Saved Games, AppData or a publisher-specific folder, while older games may write into their installation directory. The inventory should therefore name the exact item to preserve, not merely the drive on which the game is installed.
Confirm what the launcher cloud actually covers
Open the launcher while online and check the individual game's synchronization status. Steam explains that Steam Cloud can store game and platform data, but availability and implementation are set per game. Xbox cloud saves depend on the Xbox network and the title's support. GOG Galaxy offers cloud saves for supported games. A launcher-wide feature page is not evidence that a particular title has uploaded the latest local file, so inspect the game's page, settings or publisher documentation and note the time of the last successful synchronization.
Resolve conflicts before making the backup. If a launcher asks whether to keep a local or cloud version, stop and compare dates, file sizes and the progress visible in the game. Do not click the newest-looking choice without checking the machine's clock and the actual save. Launch the game once, confirm the correct slot, exit normally and allow synchronization to finish. Then close the launcher. This produces a known state and avoids copying one version while the service later overwrites it with another.
Find the real local save path
Begin with the publisher's support page, the game's documentation or its launcher page. When official information is absent, PCGamingWiki can be a useful secondary directory for common save locations, but verify the path on your own system. Typical roots include the user's Documents folder, Saved Games, AppData Local, AppData LocalLow, AppData Roaming, ProgramData and a launcher userdata directory. Hidden folders may need to be shown in File Explorer. Never enable broad permission changes merely to expose a folder.
Identify the save by content and timing. After closing the game, inspect the candidate directory for files modified at the time of the last save. A folder that contains only shader caches, logs or downloaded assets is not enough. Some titles split progress, settings and screenshots across several locations, and some use a numeric account identifier. Copy the parent folder when it is reasonably small so metadata and companion files remain together. Record the full original path in a text file stored beside the backup.
Close every process that can still write to the save
Exit the game through its menu and wait for any saving indicator to disappear. Quit the launcher as well, including its notification-area process if it continues running. For games with dedicated mod managers, cloud agents or companion utilities, close those programs after they finish their own work. Copying while a process is writing can capture an incomplete database, a temporary file or mismatched parts of a multi-file save. A normal shutdown is safer than ending the process abruptly.
Do not start a Windows reinstall immediately after a crash. Reopen the game first if it can be done safely, confirm that the wanted save loads, exit cleanly and then copy. If the game is already unstable, preserve the existing folder before attempting repairs, because verification, rollback or a new launch may modify it. Label that first copy as pre-repair. You can make a second copy after the game works, but the untouched version gives recovery tools and support staff a better reference.
Make two independent backup copies
Create a dated folder such as Game-Saves-2026-10-18 and place one subfolder per game inside it. Copy the identified save, configuration and user-content folders without changing their internal names. Add a small manifest containing the title, launcher, account nickname without passwords, original path, game version if known and backup time. This context matters months later when several folders have generic names such as SaveGames or Profiles and when a new installation creates a different account-number directory.
Store the completed backup in two separate places. One can be an external drive or another computer; the second can be a reputable cloud-storage account you already use. Two folders on the same physical SSD are not independent backups, and a partition on the disk you plan to erase can disappear with it. If the saves contain personal names, chat logs or custom images, consider encrypted storage supported by your operating system or provider. Never put account passwords or recovery codes in the manifest.
Verify the copy before you trust it
Open the backup destination and confirm that the expected subfolders and files are present. Compare the item count and total size with the source, allowing for ordinary filesystem differences. Open the manifest and a harmless text or image file from the destination rather than the source. For especially valuable saves, create a cryptographic checksum list with a trusted tool and preserve it beside the copy. A checksum proves that a later file matches the backed-up bytes; it does not prove that the game can interpret a logically corrupted save.
Test restoration when practical. On a second Windows account, another machine, or a temporary folder documented by the game, copy one noncritical save and confirm that the game recognizes it. Avoid experiments that risk replacing the only good cloud version. If a full restore test is not feasible, at minimum disconnect the backup device, reconnect it, navigate to the files and verify their dates and sizes again. The goal is evidence that the destination works independently, not a progress bar that once reached 100 percent.
Use File History carefully and understand its scope
Microsoft File History can back up versions of files in selected libraries and folders to another drive or network location. It is useful as an additional layer when the relevant save path is included, but many AppData locations are not automatically covered by a user's ordinary library choices. Review the folders that File History protects and verify that a version of the actual save can be browsed. Do not assume that enabling the feature immediately before reinstalling captures every hidden game directory.
File History is not a disk image and it is not a substitute for the manual game inventory. System images, OneDrive folder backup and third-party tools each protect different scopes. Use only software you already trust and understand, and make sure the recovery process is documented. Whatever tool you choose, retain the direct copied folders as a portable fallback. Proprietary backup containers can be useful, but a plain verified copy is easier to inspect when the original Windows installation is gone.
Back up mods, profiles and screenshots separately
Mods can depend on an exact game build, script extender, load order and manager database. Copying only the mod files may not reproduce the environment. Export a mod list or profile through the manager's supported feature, save configuration files and note the game version. Do not redistribute paid or copyrighted mod assets. After reinstalling, restore the manager and compatible tools from their official sources before reintroducing the profile. A save created with missing content can load incorrectly or become permanently altered.
Screenshots, photo-mode exports, custom maps, replays and controller layouts may be stored outside the save directory. Launchers can upload some screenshots without retaining every original file or edit. Search the game's settings and the launcher capture folder, then add these items to the inventory. If a replay requires a specific game version, keep that note beside it. Treat locally created content as personal data even when the gameplay progress itself is already synchronized.
Prepare the reinstall without erasing the evidence
Before booting installation media, confirm that both backup destinations are disconnected from the disk operation and that you know which physical drive will be erased. Check the Windows edition, account access and recovery information using Microsoft's official guidance. Do not leave the only external backup attached while deleting partitions; similar drive sizes and labels can cause destructive mistakes. Photograph or write down the target disk model if that helps distinguish it in the installer.
Keep the inventory available on another device. It should list the launchers to reinstall, the games with local saves and the destination of each backup. Avoid downloading unofficial all-in-one game packs or save-transfer utilities after Windows returns. Install Windows updates, hardware drivers and launchers from official sources. Sign in with the intended account before restoring numeric launcher folders, because a different account may generate a different directory and sync context.
Restore one game at a time
Install the launcher and game, run the title once to create its current folder structure, then exit it completely. Compare the newly created path with the recorded original. If the game supports cloud saves, let the launcher report its state but do not allow an empty new save to overwrite a known-good backup without reviewing the conflict. Copy the backed-up files into the documented location while the game and launcher are closed, preserving the new empty folder as a rollback if necessary.
Launch the game offline only when the publisher permits it and when doing so will not create a licensing or synchronization problem. Check the slot name, play time and in-game position. Exit normally, reconnect if needed and resolve any cloud prompt deliberately. Once the restored save has synchronized successfully, mark that game complete in the inventory. This paced approach contains mistakes: if one game's path has changed, you can correct it without mixing that problem with ten other simultaneous restores.
Know what not to copy back
Do not blindly restore old executables, DLL files, anti-cheat components, driver files or entire Program Files trees. These can be incompatible with the clean operating system and may reintroduce the fault that motivated the reinstall. Reinstall program components from official sources. Restore only the documented user state and custom content. If a save folder contains caches, logs and temporary downloads, prefer the narrower supported files unless the publisher says the whole directory is portable.
Scan removable media with the security tools built into the updated system before opening unknown executable content. A backup preserves whatever existed at the time, including potentially unwanted files. Be especially cautious with abandoned mod installers and community tools obtained years ago. The point of a clean reinstall is to re-establish a trusted software base while recovering personal progress, not to reconstruct every undocumented binary from the old machine.
A final pre-erase checklist
Do not erase the old installation until every important game appears in the inventory; cloud status has been checked; the game and launcher were closed; local paths were copied; two independent destinations exist; the manifest records the original locations; and at least one destination was reopened and inspected. Verify screenshots, replays, mods and controller profiles separately. Confirm account recovery access without storing passwords in the backup. Disconnect the external copy before launching the installer.
After the reinstall, keep the backup unchanged until the restored saves have loaded and synchronized across several sessions. Then retain at least one archive for a reasonable period rather than deleting both copies immediately. The same method becomes a reusable maintenance habit: update the inventory after major campaigns or creative projects, test cloud sync before travel, and periodically verify the external copy. A backup is not a product you buy once; it is evidence that your irreplaceable game state can survive the next failure.